Creating WebUI Workspace using Eclipse Webtool
Overview
This article is a follow-on to Create your ADempiere development environment and describes how to modify the ADempiere project and your development environment to enable debugging of the zk webui using the Eclipse Webtool. Eclipse Webtool support was added in version 341. This additions allows you to run or debug the Zk web client using Eclipse webtool (Europa JEE and above ) and Apache Tomcat.
Setup the Project to Include the Webtool Support
Before you start, see Create your ADempiere development environment and ensure you can build and debug the swing client.
Aditional checklist
- If you do not have an Eclipse Java EE version, you have to install in your Eclipse the plugins Eclipse Java EE Tools, JST Server Adapters and JST Server Adapters - Extensions. Otherwise, you will not see nor configure the Server view in Eclipse.
- Make sure you call the menu entry Help/Install new Software and in the field Work with the url for your version, e.g. for Luna: http://download.eclipse.org/releases/luna.
- It may be necessary that you have to configure Tomcat manually (according to http://www.coreservlets.com/Apache-Tomcat-Tutorial/tomcat-7-with-eclipse.html): Copy directory /your-tomcat-base-directory/webapps/ROOT to /your-workspace/.metadata/.plugins/org.eclipse.wst.server.core/tmp0/wtpwebapps.
As the webtool is not setup by default, there is a bit of work to do each time you update the main project branch. Here are the steps:
- Checkout the ADempiere branch of interest and build it using the ant build in utils_dev/build.xml.
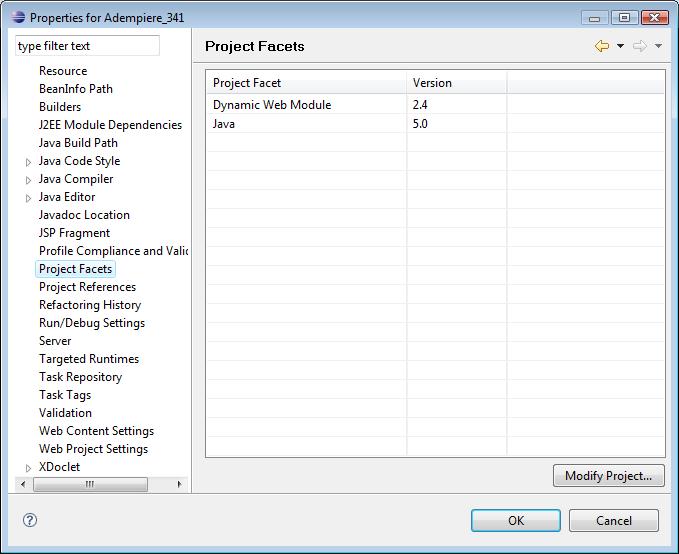
- Open the Properties for the ADempiere project
- Select Project Facets and click the link, "Convert to faceted form..."
- Confirm that Dynamic Web Module is selected (Version 2.5 is OK.)
- Confirm that Java is selected (select a JAVA version compatible with the code in the project)
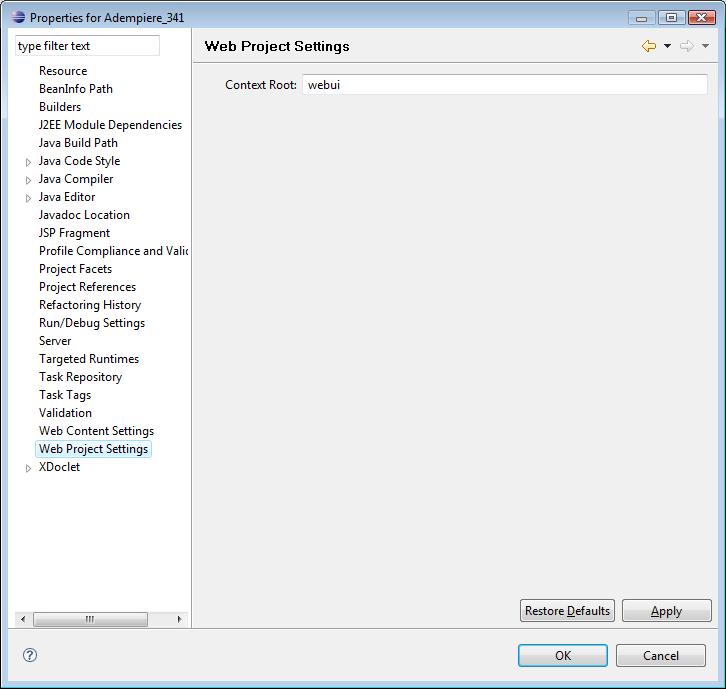
- Close the Project Facets and click Web Project Settings in the Project Properties dialog. This will show an error :"Contect Root cannot be empty". This is a problem with the eclipse luna version and you'll need to check that the following "natures" are included in the eclipse .project file (there may be others but you need at least these two):
<natures><nature>org.eclipse.wst.common.modulecore.ModuleCoreNature</nature><nature>org.eclipse.wst.common.project.facet.core.nature</nature></natures> - Refresh the project and look at the Project Properties, Web Project Settings again. You should see the context root as "webui".
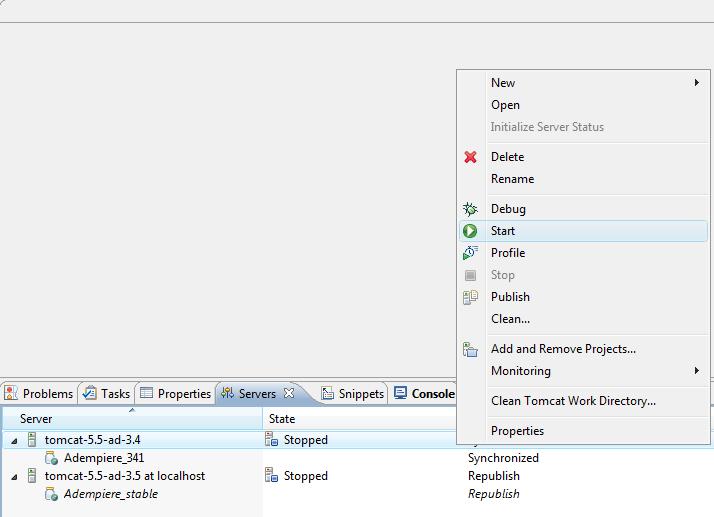
- Now add servers. Its easiest to do this by right clicking in the server tab and selecting "New" or clicking the link to add servers if you see it. In the dialog that appears you can select the server you want to use and download it to a directory. Apache Tomcat V6.0. installed in a directory like c:\dev\apache will work. The server should identify the available web projects and you can add the ADempiere project to the server.
- Right click the server and select Run. Note that this won't work but it will publish the project and create a launch configuration for it.
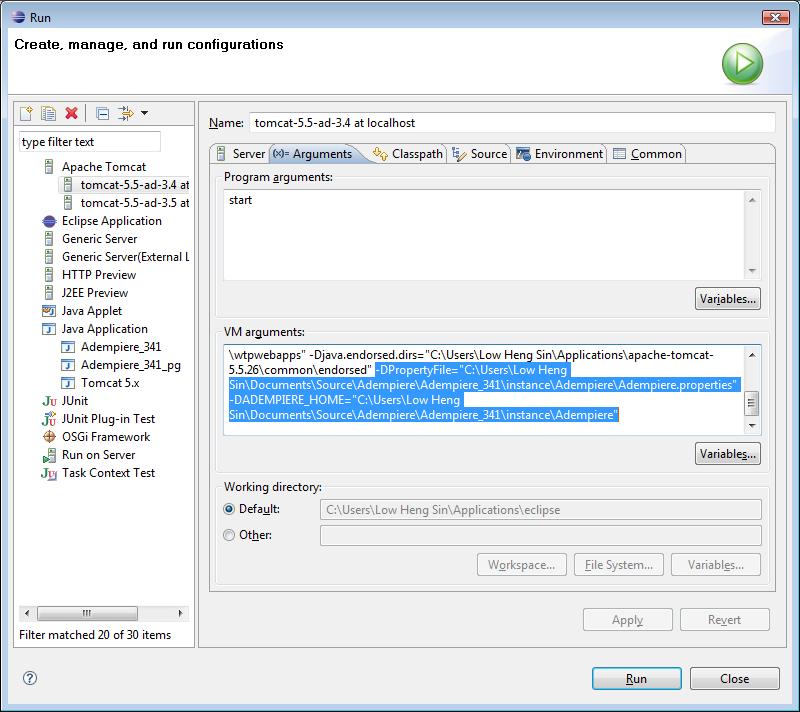
- Edit the launch configuration and add the following to the arguments: -DPropertyFile=${adempierePropertiesFile} -DADEMPIERE_HOME=${ADEMPIERE_HOME} (Note: These arguments use variables but you could replace the variable with the relevant paths. The adempiere.properties file needs to exist which is why you need to build and install ADempiere.)
- Save the configuration.
- Run the server launcher again from the debug configuration. Check the console for errors. It should startup normally.
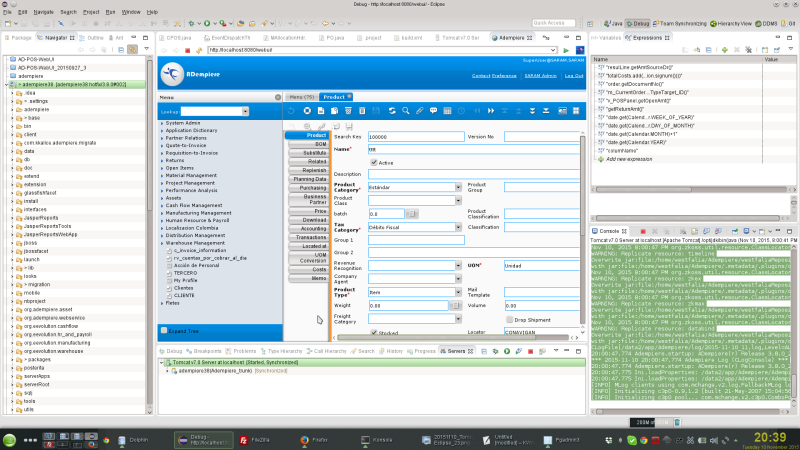
- Once the server has started, open a browser and go to localhost:port/webui. Usually, Tomcat uses port 8080. You should see the standard login page. You can now insert breakpoints in the webui code and interact with the code from the browser.
- To make it easier to reproduce these steps, make a stash of these changes in git and reapply them from the stash when you switch to a new branch.
To customize the zk interface, see Create your ADempiere customization environment.
If you have any questions, please join our chat (http://www.adempiere.net/web/guest/chat-on-line).
- If you want that ADempiere ZK opens in Eclipse
- select ADempiere Project
- Right mouse click
- select as you please Run As/Run on Server or Debug As/Debug on Server
- In the opening dialog select server and resource, press finish
- The Adempiere ZK login dialog opens in an Eclipse view.
- Result
Older Instructions
Note
This article is based on an older version of eclipse. While the screen shots will not match exactly, the process is similar.
You can verify that everything is in place by checking the project properties:
- Project Facets (do not change anything here.)
- Web Project Settings
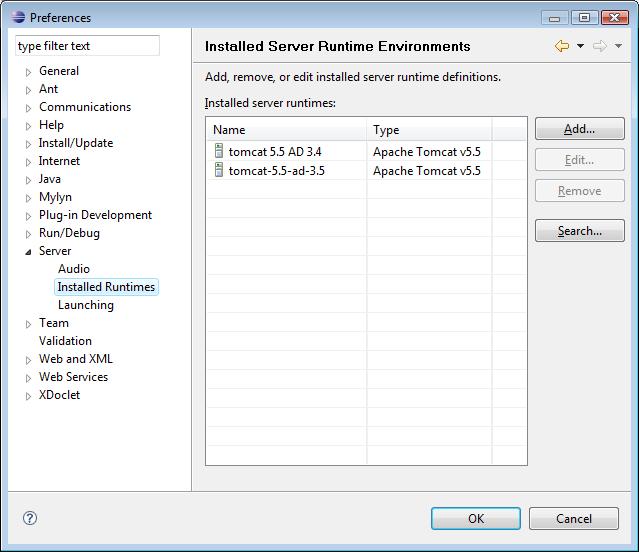
Install Tomcat Runtimes
First, you need to install a Tomcat runtime for the deploying and running of the zk Web Client. Use Tomcat 5.5+
To install a new Tomcat runtime, open the preferences dialog Window->Preferences and select the Server->Installed Runtimes. Use the Search button to locate your tomcat installation home folder.
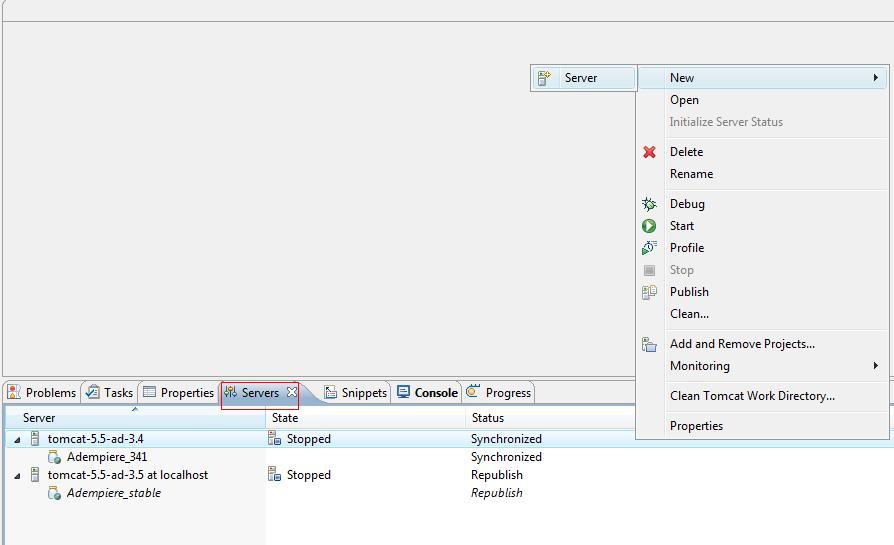
Define a New Server
At the Servers view, right click to open the context menu and select New->Server.
If server view is not visible then you can use Window→Show View→Others ... to open it.
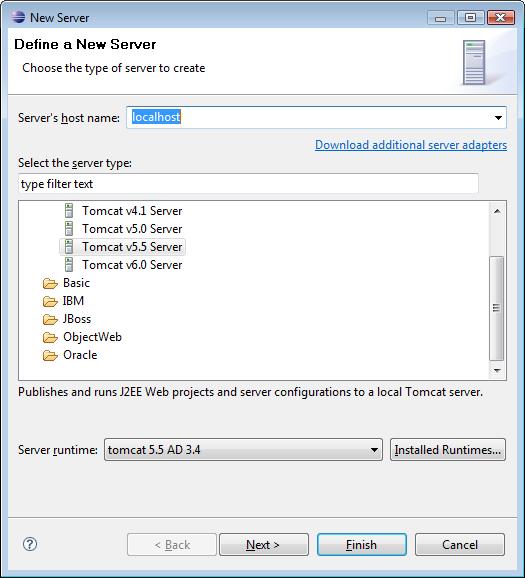
- Select the correct server type and the server runtime you have setup earlier.
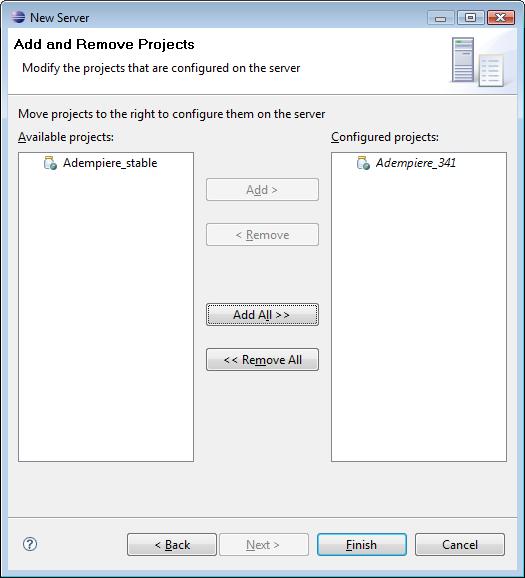
- Add your project to the server instance to be created
- The created server instance is now ready for use. Just Start the server once and then stop it. Do not try to debug it at this moment.
Define location of ADempiere property file and ADempiere home
Now you have to define the location of your existng working 'Adempiere.properties' file and ADEMPIERE_HOME as system parameter for your Tomcat Instance. To do so, select Run->Open Run Dialog... and select the server instance you have created. Note Note that the entries for your server instance in the Run dialog will only be created after you have start it for at least one time. Select the arguments tab and append your property file path and home parameter at the end of VM arguments.
It is highlighted in the pictures below:
Hengsin 01:11, 4 August 2008 (EDT)
To avoid the problme "NoClassDefFoundError" you need to following the guidlinse suggested below in 'Trouble Shooting'. So, first follow that instruction, before you debug the zk webui.
Trouble Shooting
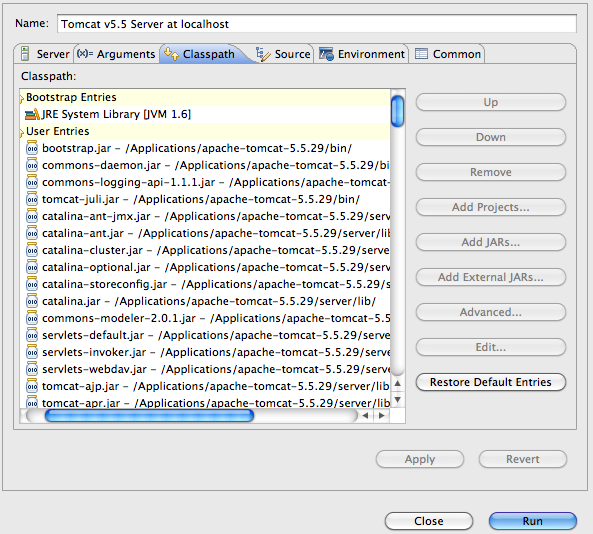
I had a problem to start Tomcat with "NoClassDefFoundError". Missing class path to adempiere jars. Solved by editing run configuration. Go to classpath section at user entries add external libs from tomcat\lib (or tomcat\server\lib) than add project - AdempiereTrunk
Apache jars needs to be at the first place in the classpath. See the image carefully along with the description below.
- Bootstrap Entries
- JRE Library
- User Entries
- tomcat_dir/bin/*.jar
- tomcat_dir/server/lib/*.jar
- Adempiere Project
- Adempiere Libraries