How to document?
ADempiere is an open-source project that values and appreciates community contributions. If you want to add valuable information to the documentation, here is a step-by-step guide.
Requirements:
- Git
- Visual Studio Code
- NVM (Node Version Manager)
- Node.js 14.x or later
How to Install Git?
- To download Git, you must have an account created.
If you want to install Git on Linux through a binary installer, you can generally do so using your distribution's package management tool. For example, on Fedora, you can use yum:
yum install git
On a Debian-based distribution like Ubuntu, you can use apt-get:
sudo apt-get install git
For additional options, the Git website has installation instructions for different types of Unix. You can find this information here.
To configure Git to use your GitHub account when making commits, there are some settings you need to check and adjust.
git config --global user.name "YourGitHubUsername"

git config --global user.email "YourGitHubEmailAddress"
Make sure to replace "YourGitHubUsername" and "YourGitHubEmailAddress" with your GitHub credentials.
The --global option sets these settings globally, meaning they will apply to all your repositories.
- Verify Git's current configuration: You can check Git's current configuration by running the following commands in your terminal:
git config user.name
git config user.email
These commands will show you the username and email address configured in Git.
How to Download Visual Studio Code?
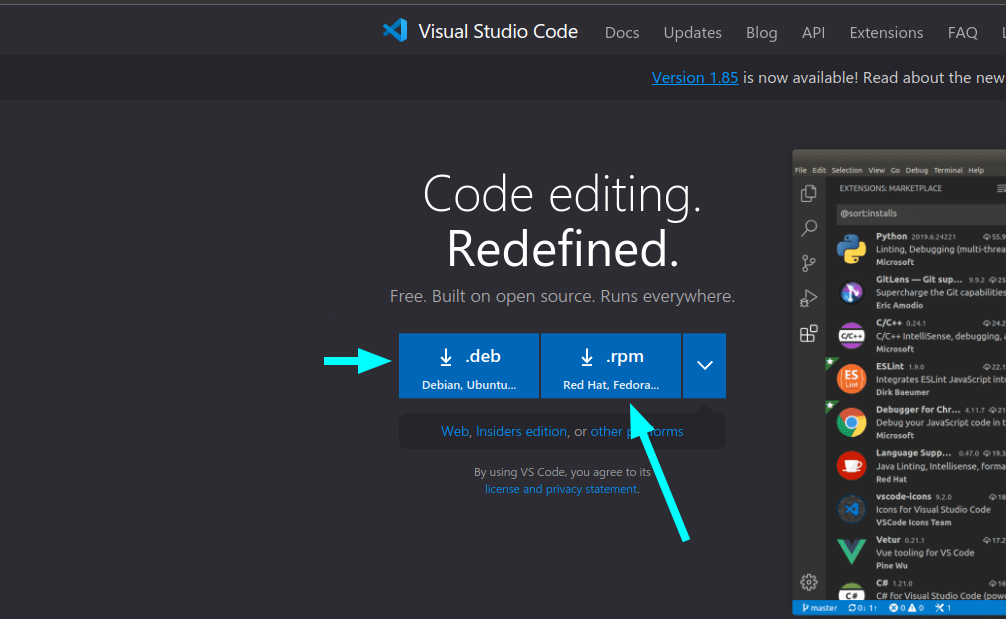
To download VS Code, go to its official page here.
If you're using a Red Hat-based system like Fedora or Red Hat Enterprise Linux, you should select the .rpm file.
If you're using a Debian-based system like Ubuntu, Linux Mint, or Debian, then you should select the .deb file.
To install it, simply click on the package:
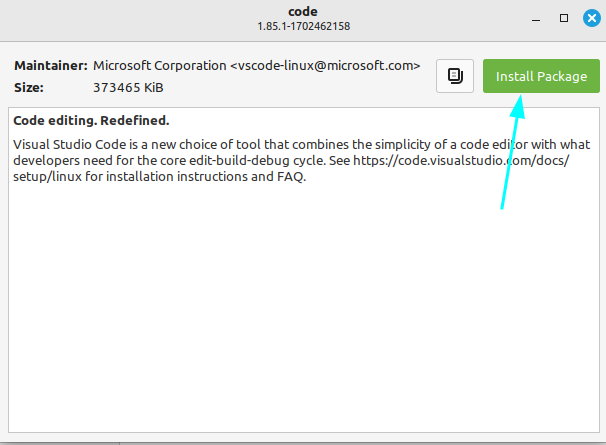
And that's it! You will have Visual Studio Code installed.

It is recommended to install the following extensions to work comfortably:
- Git Graph
- Git History
- Git Tree Compare
- Git Lens
- Markdown Preview Github Styling
- Markdownlint
- Github Pull Requests And Issues
GitHub Pull Requests And Issues
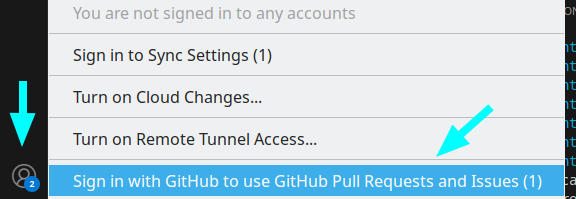
Finally, it is essential to configure authentication in Git through VS Code to interact with GitHub. To do this, follow these steps:
- Open VS Code.
- Go to Accounts.
- Select Sign in with GitHub....
- This will redirect you to the official GitHub page. Make sure you have previously logged in to GitHub to link the account successfully.
How to Install NVM and Node.js?
- Run the following command to download and install NVM:
curl -o- https://raw.githubusercontent.com/nvm-sh/nvm/v0.39.1/install.sh | bash
- Update the profile:
export NVM_DIR="$HOME/.nvm"
[ -s "$NVM_DIR/nvm.sh" ] && \. "$NVM_DIR/nvm.sh"  # This loads nvm
[ -s "$NVM_DIR/bash_completion" ] && \. "$NVM_DIR/bash_completion" # This loads bash completion for nvm
- Install Node.js
nvm install 20.10.0
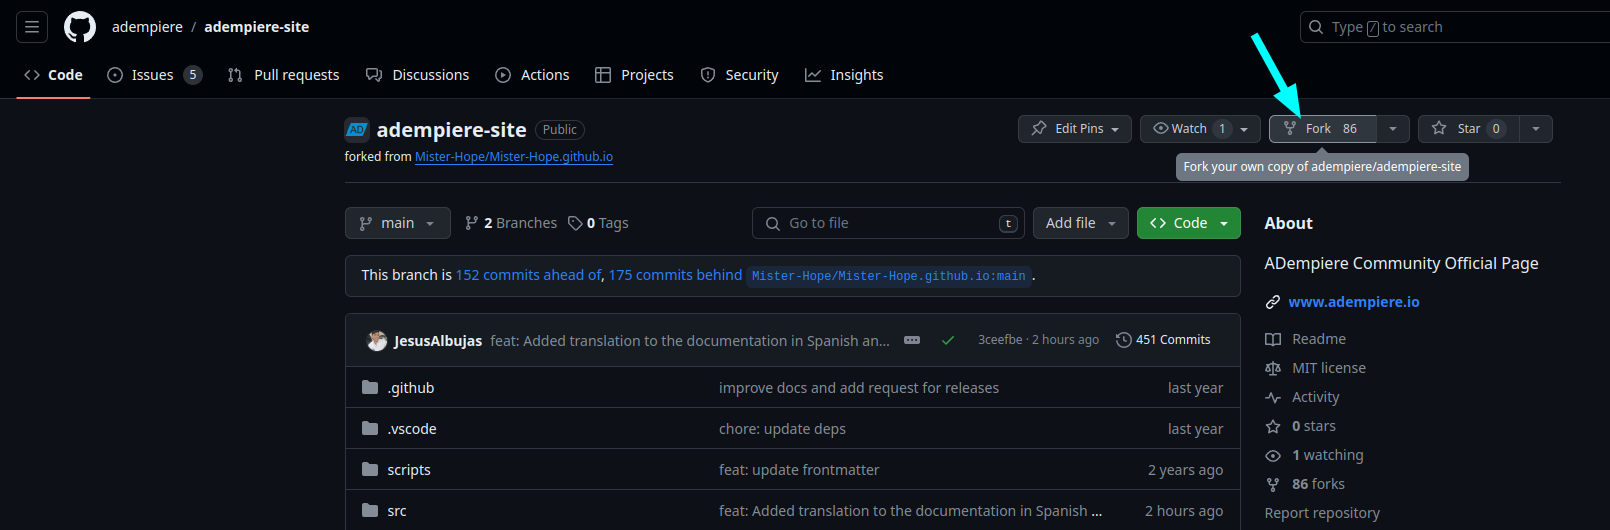
Forking the Official ADempiere Documentation Repository
You can find the repository by clicking here.
To fork the repository, follow these steps:
Click the "Fork" button in the upper right corner of the page.
You will be redirected to the Create a new fork section. Uncheck the option to only copy the main branch and click Create fork.
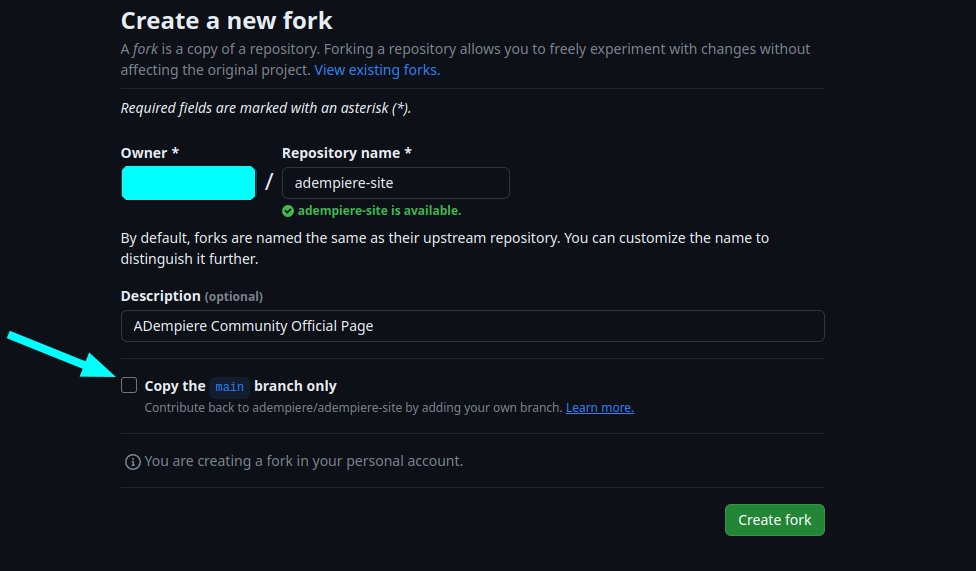
With these steps, the fork will have been created.
Download Cloned Repository
- Copy the link of the cloned repository.
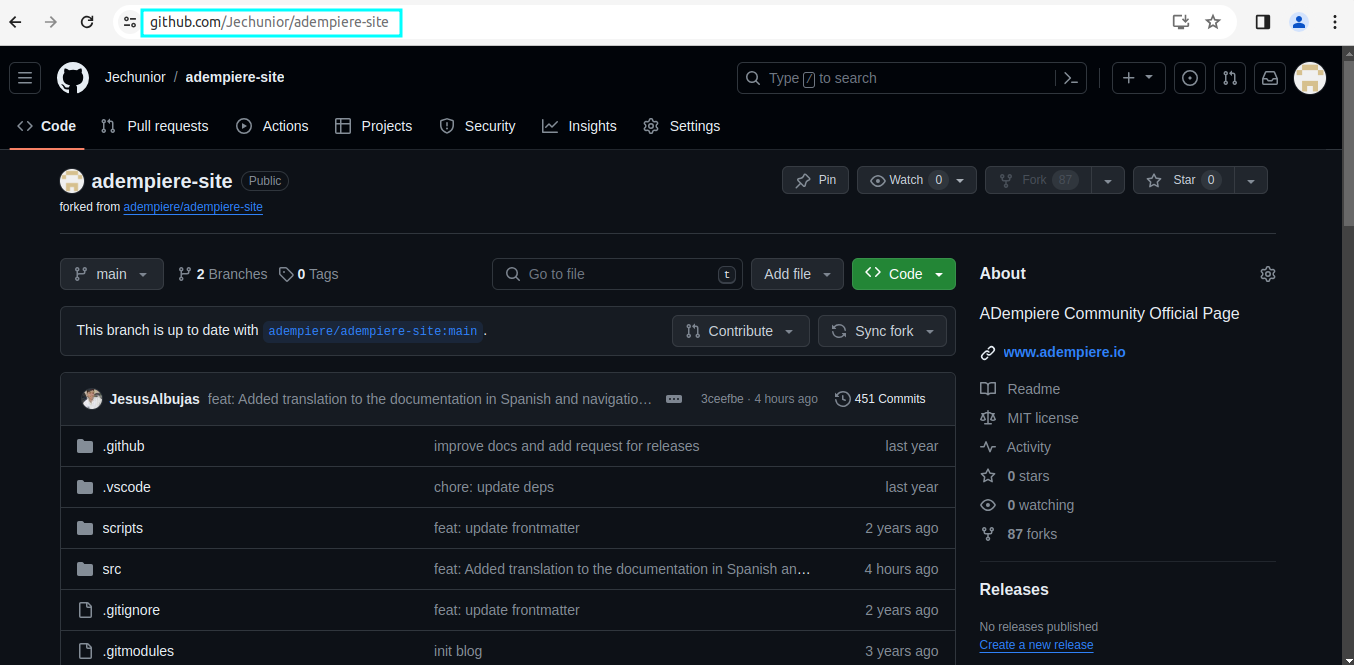
- Go to the terminal and write the following command, for example:
git clone https://github.com/your-user/adempiere-site
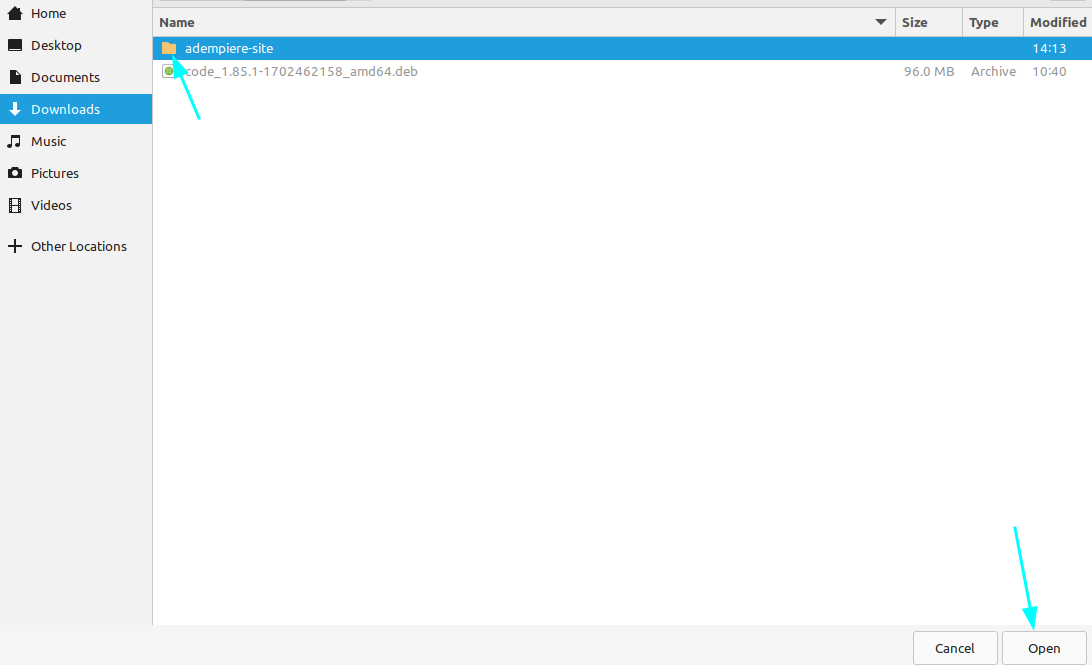
- Open Visual Studio Code > Open Folder
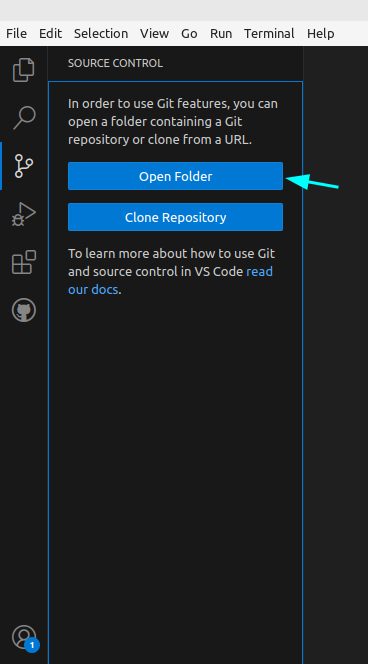
Look for the repository and open it.
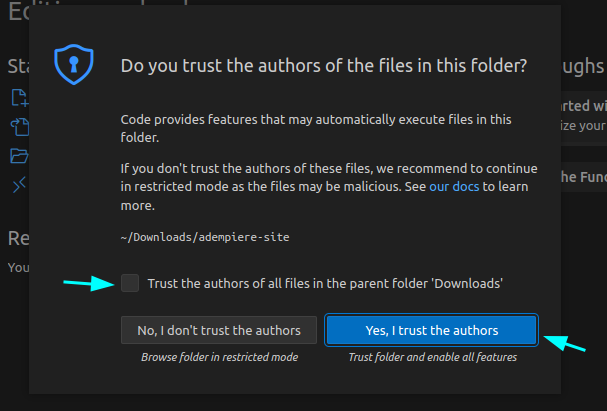
Visual Studio Code shows a message the first time it opens a folder. Here Visual Studio Code asks if it should be trusted or not.
If you select No, I don't trust the authors, Visual Studio Code will open the workspace in restricted mode.
If you select Yes, I trust the authors, Visual Studio Code will trust the current workspace and enable all the editor features you are used to.
Activate the checkbox and select Yes, I trust the authors.
How to Commit from Visual Studio Code?
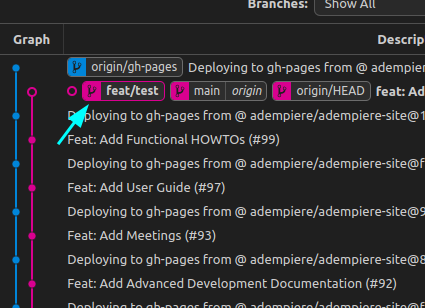
Go to Git Graph > Right-click on main > Create Branch
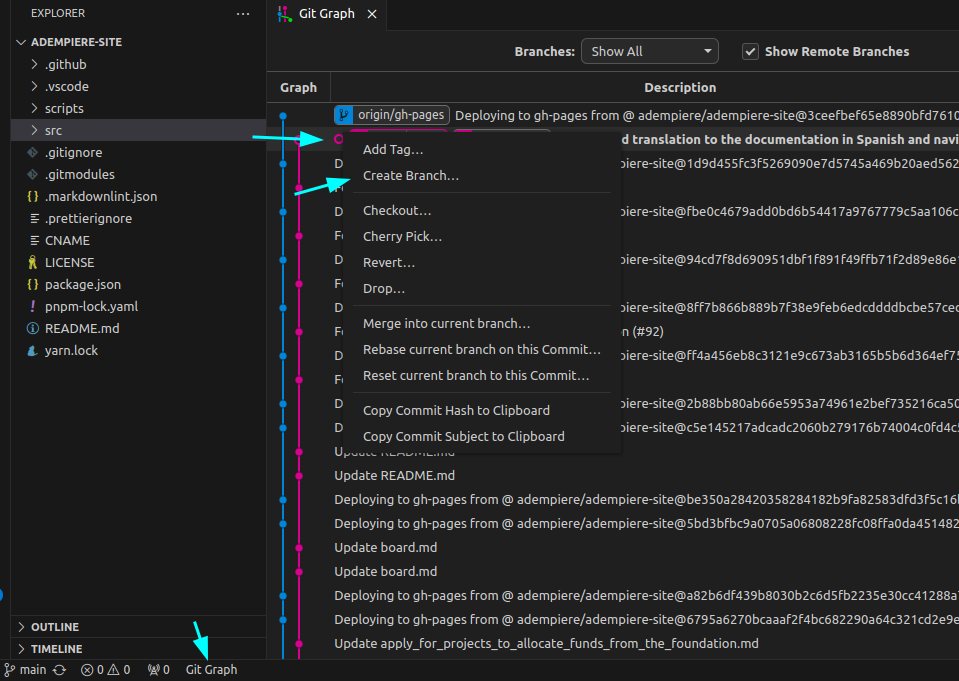
Name the branch. This created branch is where you will work, meaning, create or modify files, insert images, among other functions.
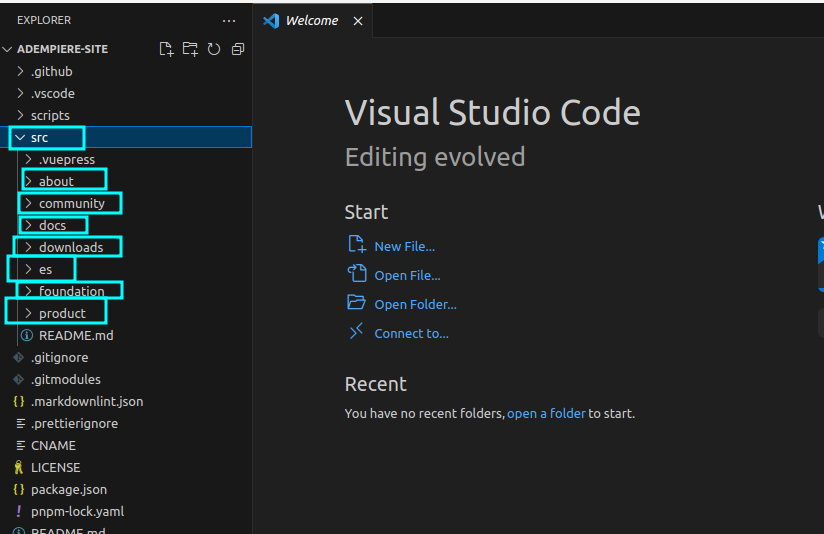
For example, documentation files are located in src, as shown in the image.
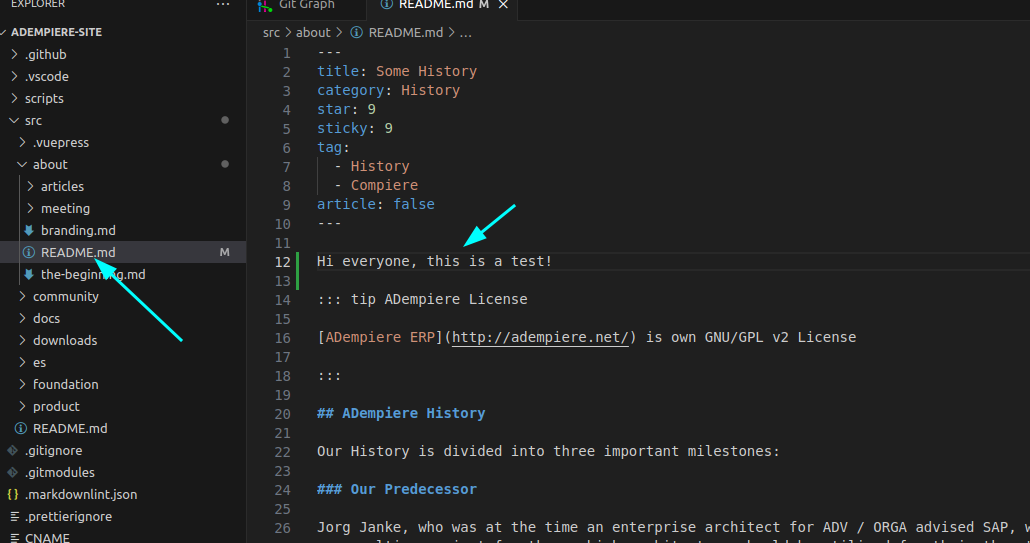
Add information to a file.
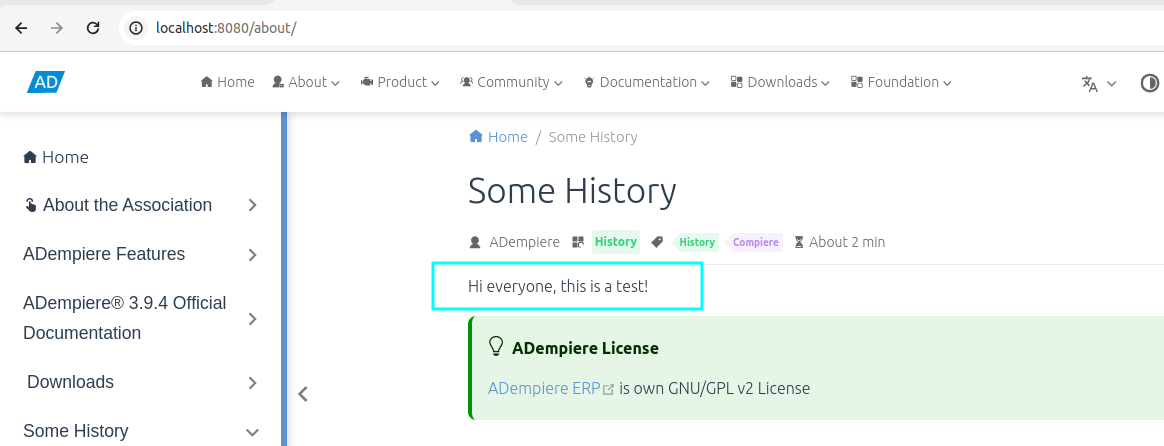
When making a change to a file, you must validate that it is correct. To do this, build the page to visualize the changes.
Press ctrl + j to display the terminal from Visual Studio Code and install the dependencies:
# Using npm
npm install

# Or using yarn
yarn install
Subsequently, run to run the page:
npm run dev:vite
Here you can visualize the changes.
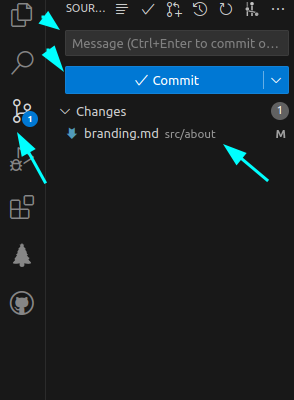
To commit, go to Source Control > and you will see the file that underwent changes > You can add a message and then commit. Once the commit is done, you must go to your repository on Github where you will see the option to make a pull request, this being the final step, and there is nothing left but to wait for it to be accepted by an administrator.